Michael MacDonald Siphon Coffee Brew Guide
We were very excited to be able to make Coffee Siphons available to our customers and coffee lovers all across South Africa. However a siphon is a pretty advanced and potentially intimidating manual coffee brewing device, so we knew that a great brew guide was going to be essential.
Serendipitously, our friend Mike MacDonald of Origin Coffee Roasting had just released an exceptional step by step guide on siphon brewing which he kindly allowed us to republish. Mike is a very talented roaster and manual brewer and if you're lucky enough to be able to stop by Origin HQ, you can have the pleasure of enjoying both the process and results of one of his siphon brews. For everyone who wants to try it at home, here is Mike's advice on siphon brewing.
What you'll need
Siphon brewers are pretty "complete" tools, so you only need the basic coffee accessories that many coffee lovers will already have. There are some optional items that might make things easier, so we've divided this list into two sections.
The essentials
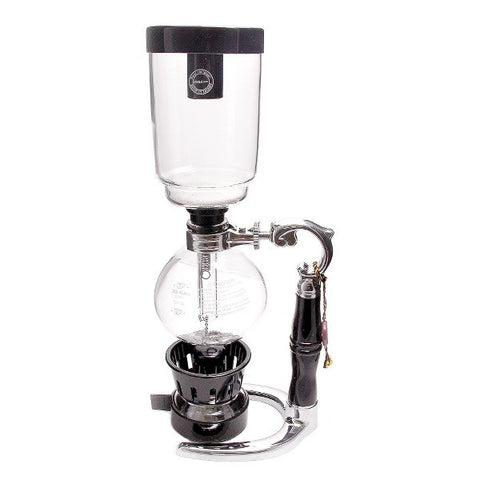
- A siphon with standard accessories (stirring paddle, filter, etc.)
- A kettle to heat your water
- A coffee grinder
- Fresh coffee beans
- A scale to weigh your coffee
- A timer (any will do)
Nice to haves
Dosage & direction
Use ~70g/L with a grind size slightly finer than filter (we like 3-4 on the Severin Coffee Grinder). This would mean:
- ~28g for a 3 Cup Yama Tabletop Siphon
- ~42g for a 5 Cup Yama Tabletop Siphon
Note: grind your coffee at the last possible moment to make sure it's as fresh as possible!
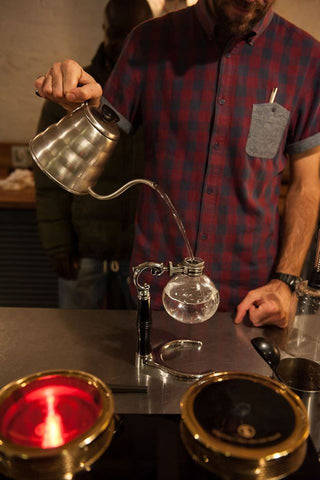
Step 1: Fill Bottom Chamber of Siphon
Either use a scale to measure the amount of water or use the markings on the siphon. 1 cup is ~125ml (i.e. ~125g). A pouring kettle may help you aim the water slightly better and pre-heated water is a great way to shorten the total brew time!
Step 2: Place Bottom Chamber Over Heat Source & Insert Top Chamber With Secured Filter At An Angle
Here you're trying to get the water to boil before you fully insert the top chamber. While the water begins to heat up, secure the cloth filter in the top chamber using the spring & hook assembly. Then place the top chamber into the bottom one resting at an angle.
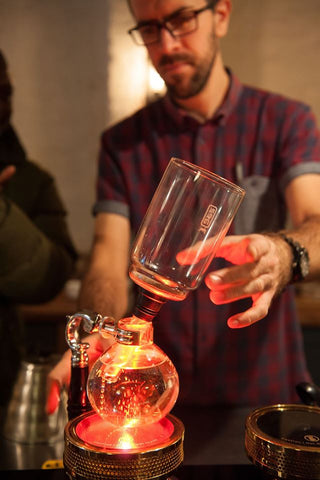
Step 3: Let The Water Come To A Full Boil
You should see the water bubbling vigorously before you go to the next step.
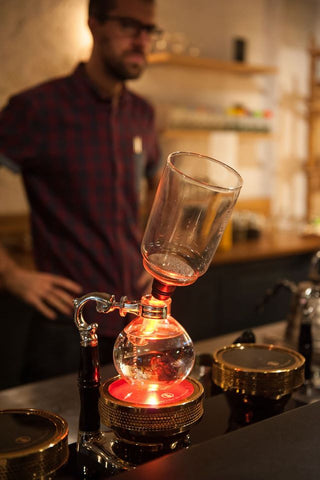
Step 4: Fully Insert Top Chamber And Allow Water To Rise Into It
Once all the water is in the top chamber, you can turn the heat down slightly. This is where you might want to use a thermometer to confirm your water is at an optimal 90-93°C.

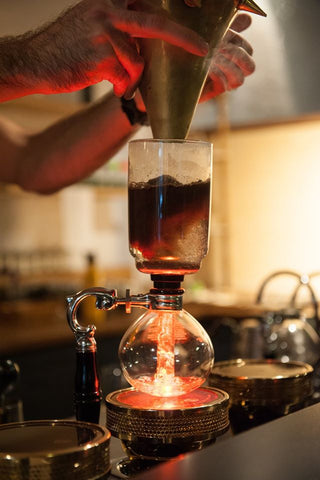
Step 5: Add All Your Coffee Into The Top Chamber
If you have an electric grinder, you can quickly grind at this point. Otherwise, having your ground coffee waiting for this step may be a good idea.
Step 6: Quickly Start A Timer & Stir To Saturate All Coffee
It's important to make sure that all your coffee is wet and extracting evenly. You'll need to keep stirring every 10s or so as a crust forms at the top. Try to use the plastic stirrer that comes with the siphon or another plastic/wooden utensil. Metal is not a good idea as you could crack the glass.

Step 7: At ~45s, Turn Off Your Heat Source & Stir To Create A Vortex
Mike recommends stirring about 6 times here. Your aim is to create a little whirlpool that will encourage the coffee to draw down quickly.
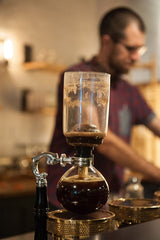
Step 8: Vacuum Draw Down
You shouldn't need to do anything except watch here. The removal of heat will create a vacuum in the bottom chamber which will draw the coffee through the cloth filter. This process should take ~1min for ~1m45s total extraction time. This can vary depending on ambient temperature.

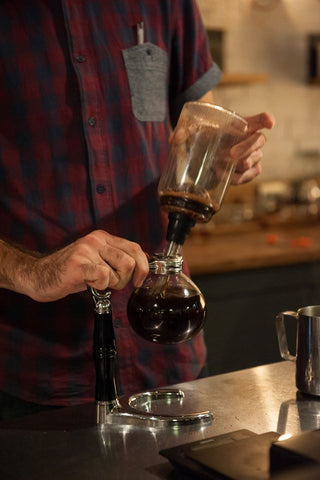
Step 9: Remove The Top Chamber
The top chamber should cool down relatively quickly so it can be removed. Do this by rocking it back and forth until it comes loose. You can use the stand provided (also a lid) to rest it while it cools. Don't wait too long to clean it and the filter afterwards!
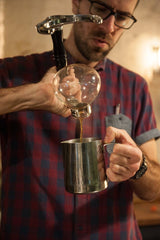
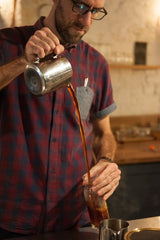
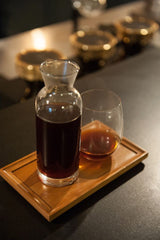
Step 10: Pour & Enjoy (Let It Cool)
Siphon coffee comes out very hot so be careful not to burn yourself. Either wait a few minutes or further cool it by decanting it a few times.

Happy Vacuum Brewing!
This brew guide was first published on Medium here and photographs are from Origin Coffee Roasting's facebook page here
About Michael MacDonald
Mike has worked in the coffee industry for 7 years and is a roaster and coffee sommelier for Origin Coffee Roasting in Cape Town. He's an aspiring recreational mycologist as well as a lover of alluring whiskies, craft beer and interesting wines.
You can follow Mike on Twitter: @Mmdsl28
Comments
This is so cool! Just bought one of these babies! BUT I’m using the alcohol burner. What heat source are you using in this example. It looks like a hot plate thing???
Hotbeans!
Posted by Lourens on July 07, 2016
Hey Lourens! Great purchase! That’s a Halogen burner – we wouldn’t recommend that for home usage – just for cafés where you’re brewing frequently. A butane burner is a great option for home.
Posted by Cape Coffee Beans on July 21, 2016
please give me more information where I can purchase vacuum coffee maker?
Thanks
Posted by Allen Lai on March 18, 2017
Hey Allen! You can buy one straight from us. If you click on the links in this post, it will take you to the product pages. Will drop you an email now.
Posted by CCB on March 22, 2017
Super useful, thanks! My wife got me one of these for Christmas along with a butane burner, but I’ve been making some mistakes that this article clears up for me. Even with those mistakes though, the siphon has produced some really delicious coffee!
What is your recommendation on cloth vs metal filters? I currently have the cloth filter that came with. The metal filter seems like it would be much easier to clean, but I’ve read that it can change the flavour of the coffee – is that true?
Posted by Gerrit on January 27, 2021
Hi Gerrit,
To be honest, I would worry more about an older cloth changing the flavour of your coffee than the metal one, at least if you mean in an undesirable manner. Having said that, metal will let through more oil and sediment than cloth, so that could change the cup character, but not necessarily in an undesirable way. It depends how much you value you the clean nature of the cup. Some people like more body.
Posted by Phaedon on January 27, 2021
Hi, I would just like to know what fuel to use for the standard burner that comes with the Yama? I received a Yama 3 cup siphon but I can’t find a proper answer as to what to use as a fuel source for this burner. Thank you for the amazing brewing guide! Will definitely be trying it out once I have it all figured out!
Posted by Ivan Van Aswegen on March 23, 2021
Hi Ivan,
Great question! The best alcohol we’ve found to use with the packaged alcohol burner is what is sold in South Africa as ‘methylated spirits’. You can find it it at many convenience and grocery stores.
Happy brewing!
Posted by Phaedon on March 23, 2021