+

Free delivery in SA on orders over R500

How To Get The Best Out Of Your French Press / Coffee Plunger

Whether you call it a french press or a coffee plunger (or anything else for that matter), there's a pretty good chance you've got one in your home. These classic coffee makers are everywhere, but tragically, they're often held in poor regard. In reality, the biggest problem with the french press is that most people just don't use it correctly.

French Press Coffee Plunger With Spoon, Scale & Timer

We really believe that even the most humble coffee plunger can produce a great cup of coffee with a little care and attention. This classic brew method actually produces wonderful, full-bodied cups of coffee and captures the full array of flavours and aromas that your beans have locked inside them. In this article, we'd like to give you our take on how to get the best out of your press.

The Dos & Don'ts of French Press Brewing

Later in this article, we've included a step by step guide on coffee plunger brewing, including some helpful photos, but we thought we'd start with some basics. Getting better coffee out of your french press can be as simple as following some do's & don'ts.

Do

Don't

  • Use freshly ground coffee from whole beans
  • Use stale, pre-ground awfulness
  • Use a measured brewing ratio (we recommend 60g/L)
  • 'Eyeball' your coffee and water quantities
  • Use water at around 93°C
  • Pour boiling water on your coffee
  • Time your extraction (we recommend 4 mins)
  • Use your gut to tell you when the coffee's ready
  • Pour or decant your coffee soon after plunging
  • Leave half your coffee in the plunger in contact with the coffee grounds to slowly over-extract and become bitter & vile

What You'll Need

  • A french press / coffee plunger (even that old one at the back of your cupboard will do)
  • coffee grinder
  • kettle to heat your water
  • Something to stir with (ideally not metal if you don't want to scratch your glass)
  • Hario Drip Scale OR the following items:
    • A kitchen scale to weigh your water
    • A more precise coffee scale to measure your coffee (if possible)
    • A timer (most phones have one if your kitchen doesn't)
  • Optional: a thermometer to measure water temperature

Step 1: Decide how many you're brewing for & put the kettle on

One of the great things about french presses is that they come in all different sizes and it's one of the few brew methods that isn't much affected by the amount of coffee you're brewing. Use a ratio of 60g/L; for instance:

  • 1 mug: 15g coffee & 250ml water
  • 2 mugs: 30g coffee & 500ml water
  • 3 mugs: 45g coffee & 750ml water
  • 4 mugs 60g coffee & 1000ml water
  • etc.

So pick how many you're brewing for and put the kettle on, BUT we'd recommend boiling 2x as much water as you'll need for brewing (see step 3 below).
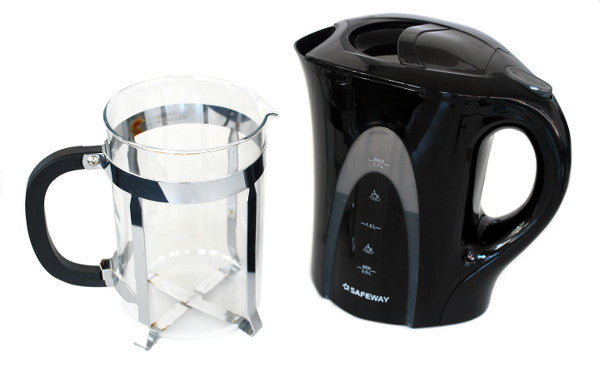
Coffee Plunger With Electric Kettle

Step 2: Weigh & grind your coffee

The kettle will take a while to boil, so this is a good time to weigh out your coffee beans using the 60g/L ratio. Set your grinder to a coarse setting. For most home grinders, the coarsest is a great place to start. On the Severin Coffee Grinder, we use setting 10. Ideally, wait till the last convenient minute to grind so your coffee is as fresh as possible!

Severin Setting Dial At 10

Step 3: Pre-heat your brewing vessel

When your kettle has boiled, pour some of the freshly boiled water into the brewing vessel to pre-heat it. A lot of heat will be lost as you brew, so by pre-heating, you keep the brewing temperature a bit more constant.
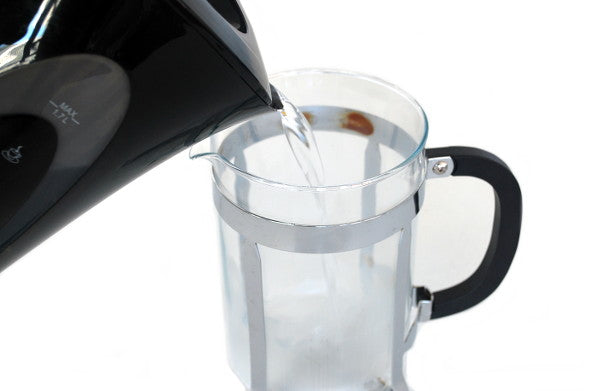
Kettle Pouring Water Into French Press

Step 4: Let your brewing water settle to ~93°C

During this time, you also need to let your brewing water come to ~93°C. A thermometer is handy here, but depending on your kettle, you need to wait around 1-2 mins after boiling to get in the right temperature range. Erring towards slightly cooler rather than hotter is probably a good idea if you don't have a thermometer. Water that is too hot will scald your coffee and make it bitter!
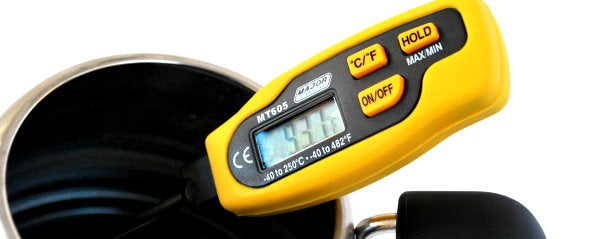
Thermometer at 93°C

Tip: If you have a Hario Drip Kettle, pouring freshly boiled water into it will bring the water to the right temperature more quickly!

Step 5: Discard your vessel-heating water and add the coffee grounds to the bottom of the plunger
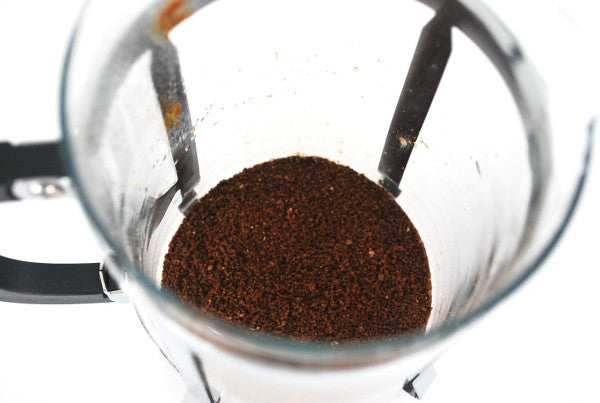
Ground Coffee In Coffee Plunger

Step 6: Set a timer for 4 mins and put your plunger on top of a 'zero-ed' scale

Timing your extraction is very important. Too short and your coffee will be sour and acidic. Too long and your coffee will be bitter. Don't leave it to chance - use a timer!

In a similar vein, you need to make sure you're using the right amount of water, and the easiest way to do that is to use a kitchen or Hario Scale. 1ml of water weighs 1g.
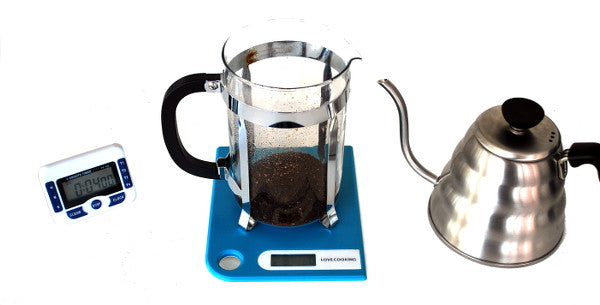
Coffee Plunger On Scale With Kettle & Timer

Step 7: Bloom your coffee with a bit of water (2-3x coffee weight)

It's good practice to start by encouraging the gases to escape from your coffee (called blooming) before adding the rest of the water. Try to start your 4 minute timer just as you pour the first bit of water onto the coffee. Aim for 2-3x the mass of the coffee you're brewing (you don't need to be super precise here) and give it a good stir. You should see the gases escaping and creating foam.
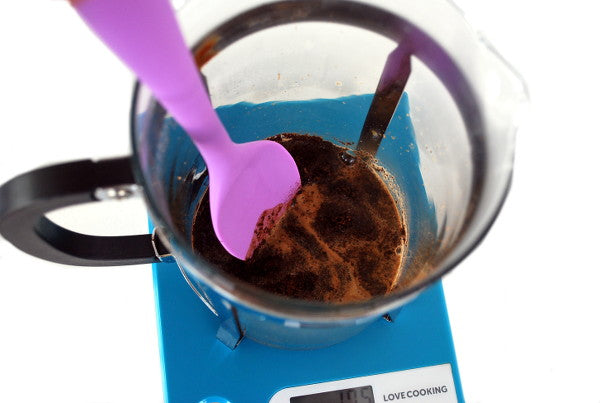
French Press On Scale Being Stirred - Bloom

Step 8: Add the rest of the water to your desired weight/volume

Do this slowly & methodically, trying to get even contact with all of the coffee. Give it a stir once the water is all in.
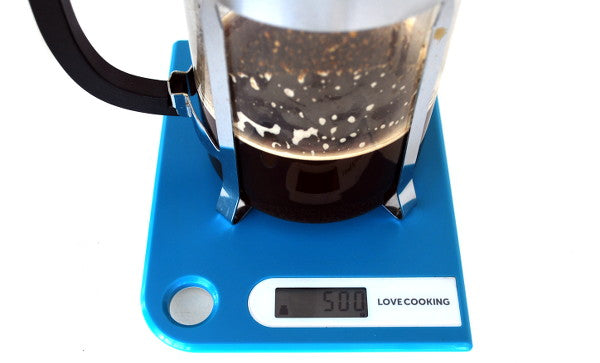
Coffee Plunger On Scale

Step 9: Stir again every minute or so

To encourage a full extraction, give the coffee a gentle stir every minute or so. Don't do it too vigorously to avoid over-extraction but just a little movement to avoid the grounds settling. We don't find that you need to put the lid on while the coffee is extracting, but opinions differ on this topic!

Step 10: Plunge at 4 minutes & serve or decant immediately

Once your timer sounds, plunge the coffee all the way to the bottom (don't be shy) and quickly serve or decant. The wire mesh in your french press does not completely separate the coffee from the water so if you leave it in there, it will become over-extracted & bitter.
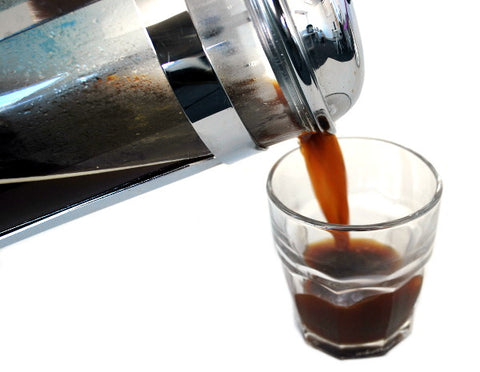
French Press Coffee Being Poured Into Glass

Note: Plungers leave a bit of sediment at the bottom of the cup, but as long as you don't try to drink it, it shouldn't bother you at all and should just settle to the bottom! 

Happy Brewing!


An Aeropress Recipe For Two

Everyone agrees, the Aeropress Coffee Maker is a fantastic brewing device. It's portable, virtually un-breakable, easy to use and, most importantly, it makes great coffee. Even better, the internet is littered with lots of different recipes to try, from pros and amateurs alike.

As a home barista brewing for yourself, you're spoiled for choice on how to use your Aeropress, but interestingly, there are very few recipes out there that explain how to brew two cups at the same time. Recognising that many lovers of coffee come in pairs, we thought we'd try to help remedy that situation.

It is worth mentioning that this is less of a problem when you're brewing short espresso-style shots. The instructions that come with your Aeropress and the markers on the side will help you with that. One easy solution is just to brew two of those and then dilute. However, a lot of the excitement around the Aeropress is about longer filter-style brews, most often using the inverted method.

This blog post is about how to make two delicious filter-style coffees with your Aeropress at the same time. Purists will tell you that you'll get better results brewing two cups separately and there may well be a small benefit in doing that. But if you want to be able to wake up in the morning and quickly brew some coffee for yourself and a loved one, this recipe should prove a lot more convenient without much compromise on the flavour!

The Approach

If you want to get straight to the recipe, feel free to skip ahead, but for those who are interested, here's a word on this recipe's approach. The main constraint the Aeropress has is its capacity (~250ml). To make enough coffee for two cups, you need more than that.

To achieve this, while producing something very similar to "typical" Aeropress coffee, we're going to brew concentrate and then dilute it. We're going to aim for the same ratio of coffee to water in terms of yield but we're going to make the steep time a bit longer, to offset the potentially slower rate of extraction caused by the higher concentration of coffee in the water.

What You'll Need

We've divided up the list of what you'll need into two sections, the essentials and those accessories which can help you fine tune your brew. You can definitely brew delicious coffee with just the basic equipment. In fact, that initial list is ideal for travelling if you want to brew coffee for two on the road.

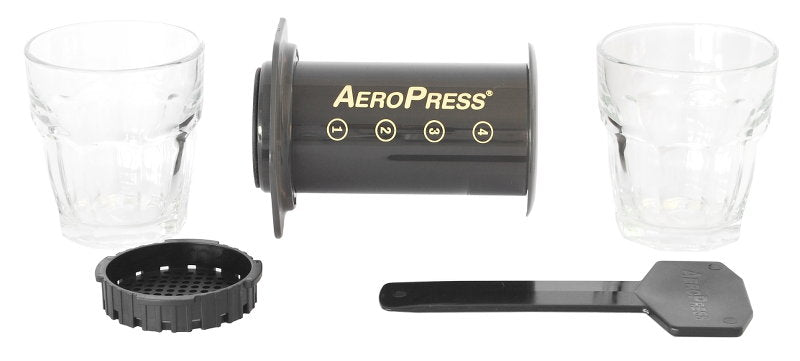
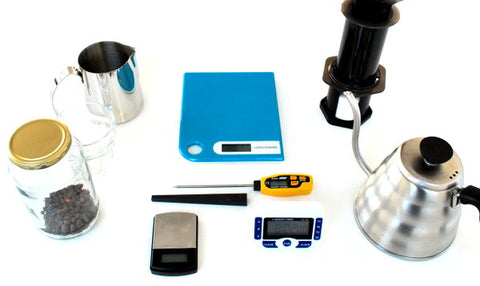
Equipment for brewing with the Aeropress for two

The essentials

  • An Aeropress (obviously)
  • All your Aeropress's accessories (scoop, funnel, paddle, filter cap, filters)
  • A coffee grinder
  • A kettle to heat your water
  • A jug to brew into that can hold ~500ml of liquid
  • Some way to measure the volume of what you brew - a kitchen scale works well but you can also just brew into a measuring cup
  • Something to time with - your phone will do!

Nice to haves

How to Brew Two Cups of Coffee With an Aeropress

Here are the step by step instructions with photographs. You may want to read through everything once before starting so you can just skim through for reminders the first time you try the recipe. Reading the whole thing and brewing at the same time may be challenging!

Step 1: Put your Kettle on to boil with a bit more than 500ml water (aiming for ~93C)

If you've got a digital thermometer, then you can decide to stop your kettle when it hits ~93C or you can let it boil and then wait 1-2 minutes for it to cool down to around that temperature. Our favourite trick is to pour freshly boiled water into a Hario Buono Kettle which brings it to about the right temperature instantly.

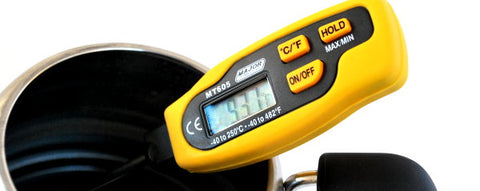
Digital coffee thermometer at 93C

Step 2: Weigh 36g of coffee & grind to a medium setting

We're using 2x the amount of coffee you'd use for a regular inverted brew. If you don't have a scale, it should be about two heaping Aeropress scoops. Any burr grinder, manual or electric will do the trick here. We use setting 5 on the Severin Coffee Grinder.

Step 3: Set up your inverted Aeropress and put the coffee into the chamber

Aeropress Inverted With FunnelAeropress Being FilledAeropress With Coffee In It

Step 4: Set a timer for 2 minutes, press start, bloom with a small amount of water and stir

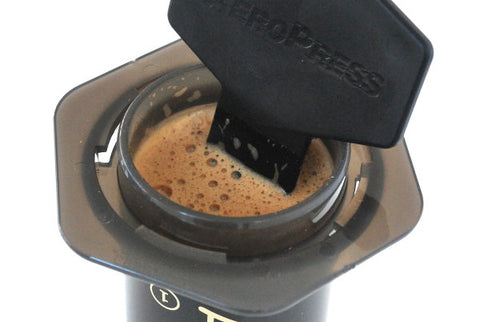
The aim here is just to saturate all the coffee grounds. You'll form what almost looks like a thick paste. This is to encourage any trapped CO2 to get out of the way and let the extraction happen properly afterwards.

Aeropress BloomAeropress Stir Paddle For Bloom

Step 5: Fill the Aeropress chamber almost to the top, leaving room for more stirring

You should have ~1m30s left on the clock at this point. You want to top up the Aeropress as much you can while allowing for spill-free stirring. Stir for 10-15s, really getting the coffee and water moving for maximum extraction. This is particularly important since you're brewing concentrate.

Aeropress Inverted Stirring With Paddle

Step 6: Fill the Aeropress to the very top & leave to steep

Now you just let the extraction magic happen for the remainder of the 2 mins you started with (there should be ~1 min left). This is a bit longer than your typical Aeropress steep time because we're making sure to get a full extraction despite the higher ratio of coffee to water. This is a good time to wet your paper filter.

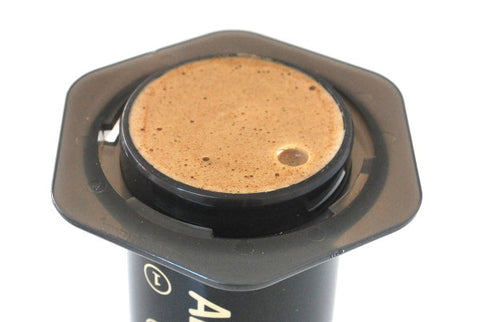
Aeropress Inverted Chamber Full

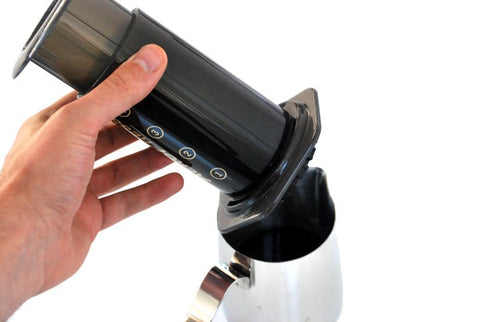
Step 7: Place the filter cap on the Aeropress, flip onto your brewing jug and plunge (should take 30-45s)

You'll need to put the filter cap on just a little before the time runs out to make sure you're ready. Don't rush the plunging process. It may be a little harder because of the amount of coffee in the chamber. Take your time and keep pushing through the hiss at the end until every drop of concentrate is out.

Aeropress with jug & hand

Step 8: Dilute to ~430ml

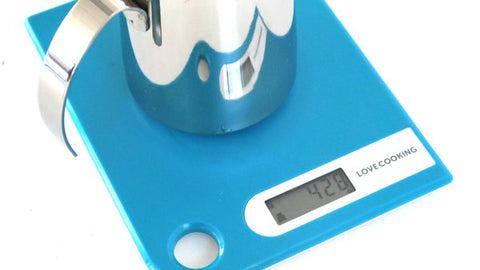
Why 430ml? We're aiming to get double the yield of a 250ml/18g Aeropress extraction. If you had a giant Aeropress & brewed 500ml/36g, you'd expect each gram of coffee to absorb ~2ml of water so the yield would be about ~430ml (428ml if this were exact).

A measuring cup is an easy way to go here but you can also do this using a scale. The trick is to tare the scale with the empty jug before you press into it, then put it back on the scale with the concentrate. You'll be somewhere around 200g and then you can just fill up to ~430g.

Jug with Scale

Note: Don't plunge on top of your scale - that's a surefire way to break it

Happy Brewing!

As with all coffee recipes, you should absolutely tweak this recipe to suit your taste, but hopefully you have a good foundation here - this should help you score some points with a loved one and get your own coffee fix, quickly & easily!

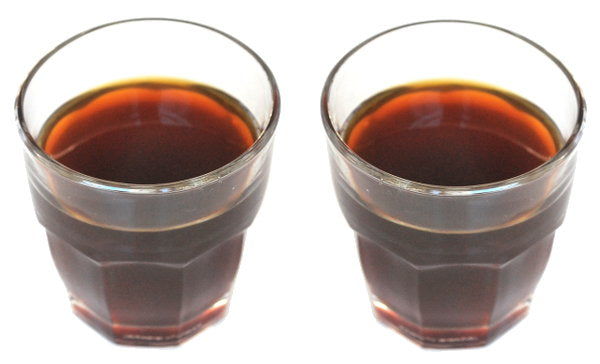
Two Glasses Of Coffee

How To Make Better Coffee In 2015

As the festive season draws to a close, we're now well & truly into the start of a new year. This is a time when many people think about what they want to improve in their lives - shouldn't your coffee be one of them?

If you're passionate, or even just curious, about coffee (which you probably are as you're reading this post), then improving the coffee you brew for yourself should be top of mind. There's lots of very specific advice out there on how to brew, but in this post, we thought we'd take a step back and touch on some basic principles you should think about.

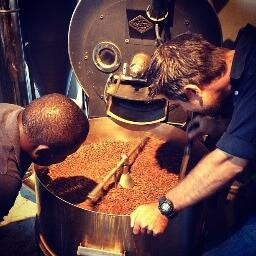
2015 in coffee beans


But first...

It really should go without saying... but just in case... the suggestions that follow assume that you're already doing the basics. For the avoidance of doubt, those basics are:

  1. Buying coffee prepared by a local, artisanal roaster
  2. Using fresh, whole beans and grinding them yourself, just before you brew
  3. Grinding those beans with a burr grinder rather than a blade grinder (or any other contraption)

If you're not yet doing any one of those 3 things, stop reading and address that first. Stale and unevenly ground coffee will make it really difficult to enjoy a great cup regardless of what else you do. Assuming that you've got those basics covered, here are our suggestions on how to take it to the next level.

Note: it does not matter what brew method you use, these principles apply across the board

1) Measure

Management clichés aside, if you're not measuring the variables that go into your coffee brewing, you're flying blind. You can't eyeball a difference of 2g of coffee, let alone a 3 degree temperature difference, and those kind of variations can drastically change your cup of coffee.

Measuring your brewing variables will help you achieve consistency and will also help you understand how changes you're making are affecting your cup (see the next point). The things you should be measuring include (in order of importance):

  • Grams of coffee (ideally in 0.1g increments)
  • Grams or millilitres of water (they're equivalent)
  • Extraction time
  • Water temperature

All of those variables are fundamental in coffee brewing and can be measured using some pretty basic equipment, most of which you probably already have in your kitchen.

2) Experiment

Once you start measuring your brewing variables and start getting delicious & consistent cups of coffee, don't rest on your laurels. Someone once said that the definition of insanity is doing the same thing over and over again and expecting different results. The same applies to coffee - your brew's not going to get better by repeating the same process.

When you actually know what your brewing variables are (because you're measuring them), you can start to adjust them to see what the impact is. The fact is that there is no such thing as a Platonic cup of coffee - there's always room for improvement. If you don't test different variables out, you won't get to experience that improvement.

Another important reason to experiment is to try to get the best out of different beans. Anyone reading this is unlikely to be the type of person that drinks the same coffee all the time. Different coffee beans will react differently to brewing variables so when you're trying something new, make sure to take the time to tweak, particularly when the result isn't as good as you expected. It may not be the coffee, it may be your brewing variables.

3) Isolate your variables

Imagine you make one of the best cups of coffee you've ever made, using a particular bean that you're very fond of. Someone asks you what you did differently and you answer that you added 3g more coffee, brewed 4 degrees colder and for 20s longer. Guess what? You have no idea why that coffee's better than it was before.

When you experiment, you need to tweak as few variables at a time as possible. Like a lab scientist, if you're not keeping everything else more or less constant, you can't attribute improvements to any particular change. Perhaps even more importantly, you're not going to learn much from your experiments to make you a better coffee brewer overall.

Be patient - you're going to make and drink a lot of coffees in your life. Take the time to apply a bit of the scientific method to your endeavours and in the long run, you will be a better amateur barista for it.

Any other thoughts?

Those are our thoughts on the principles you should be using to improve your coffee brewing this year. Did we miss anything? Disagree on any of our points? Feel free to leave your contributions in the comment section - we'd love to hear what you have to say!

Michael MacDonald applies scientific precision to Aeropress brewing

Mike MacDonald is just one of those coffee guys that you want to chat to. He takes knowing his stuff to a whole new level - he's the guy you call in when someone has a really technical coffee question. He roasts incredible coffees for Origin Coffee Roasting and he also delves deep into the science of coffee brewing. Mike recently started sharing his knowledge and the results of his research and experimentation in blog posts on Medium - the first of which was Understanding flavour in the Aeropress.

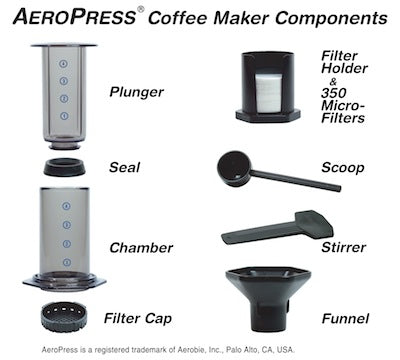
For the scientifically-minded, Mike's article is a fantastic read and for us, it begged an obvious question - how exactly does he recommend brewing with the Aeropress? Well we asked, he showed us, we tasted the results and it became very clear - this was something we needed to share. Below you'll find Mike's detailed, step by step Aeropress brewing guide that he uses to train Baristas. You can use the diagram with the Aeropress components for reference.

Aeropress System Components

Aeropress Brewing Variables

  • Use 17.5 grams to 200ml water (this should almost fill your inverted Aeropress to the top)
  • Grind to a setting between espresso and filter - err towards the finer side
  • The water temperature for brewing should be 85-90ºC (88ºC exactly is better)
  • Total extraction time: 1m45s - 1m50s

Aeropress Brewing Process

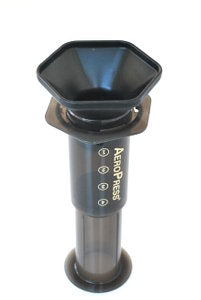
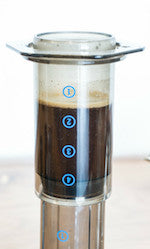
Inverted Aeropress
  1. Use the inverted method: place the plunger with rubber seal about 2cm into the chamber so that it has a solid connection and then turn the Aeropress upside down so that the chamber is facing up (see photo)
  2. Take the filter cap, place a filter paper in it and run some water through
  3. Pre-heat your cup or serving jug with hot water and then discard the water
  4. Grind your coffee and add it into the top chamber of the Aeropress - use the Aeropress funnel if helpful
  5. Pour the brewing water onto the coffee till about mid-way up the top chamber and start a timer
  6. Stir  the coffee, making sure the coffee grounds are all wet, scraping around the sides and especially bottom (just until the grounds are saturated)
  7. Now pour the rest of the water in - to about 1cm below the top rim
  8. Allow it to brew for 20 seconds ...then gently stir again in a back-forward, left-right motion - 10 movements, 5 in each direction
  9. Allow the coffee to brew till 45 seconds on the timer
  10. Lock the cap holding the filter into the chamber at the top
  11. Carefully turn the Aeropress in one swift motion and place it directly on the preheated cup or jug
  12. Plunge straight down with a mild force, until you hear air, then stop (this should take ~1 min so that the total extraction time is 1m45s - 1m50s)

About Michael MacDonald

Michael MacDonald

Mike has worked in the coffee industry for 7 years and is a roaster and coffee sommelier for Origin Coffee Roasting in Cape Town. He's an aspiring recreational Mycologist as well as a lover of alluring whiskies, craft beer and interesting wines.

You can follow Mike on Twitter: @Mmdsl28

Roast Republic on how to make a Hario V60 pour-over

One of the most recent additions to Cape Coffee Beans is the Hario range of pour-over equipment. These beautiful Japanese products are perfectly designed to brew a clean, clear & delicious filter-style coffee. However, making a good pour-over takes a little bit of technique and we've been on the look out for a great brewing guide. Fortunately for all of us, our friends at Roast Republic have just recently published a fantastic video with their very own Matt Carter showing us how to master the Hario V60. They kindly agreed to let us share it with our customers and blog readers.

Have a look at this great instructional video and please do like it and share it! We've put a summary of Matt's advice below, as well as links to the equipment he is using.

Summary of variables

  • 20g of coffee
  • Filter grind (like table salt)
  • 360ml (or grams) of water (~60g/L ratio)
  • 93C water temperature
  • ~2m30s extraction time (60s bloom)

Summary of process

  1. Rinse your paper filter with hot water & discard the water afterwards
  2. Add your coffee to the rinsed filter
  3. Pour ~60g of water over the grounds to wet them and let the coffee bloom for ~60s
  4. Pour the remaining 300g of water in concentric circles, avoiding the sides of the filter
  5. Allow water to drain through completely (2m30s) & serve!

What Matt uses in the video