Espresso: a delightfully rich and intense coffee nectar that is a result of forcing hot water through finely ground coffee with about 9 bars of pressure.
So, you have bought your first Espresso machine, and you need some help getting those shots perfect. When done right, espresso can be rich, sweet and full of complexity. When done wrong it can bitter, dry and acrid. Well, you have come to the right place. This blog post is here to take you through the basics of espresso and how to get the best tasting shot from your new setup!
What you need
Let’s start with the basics. What do you need to make espresso at home? The essentials for making espresso are:
If you want to get serious about espresso, here are some extras that will help you get the most out of your espresso:
Before we begin
As a quick foreword, it's important to mention that the most important thing about brewing espresso, like with brewing all coffee, is consistency. Small changes can make a huge differences in the resulting cup. When it comes to consistency, you can really go down the rabbit hole in terms of the level of detail you can go into, so we'll provide a few options throughout this post, from advice on how to eyeball your measurements, to weighing it out to the nearest 0.1g.
Furthermore, while this blog post should give you a solid grounding in how to make espresso and provide you with a great starting point, you should consider these as guidelines more than hard and fast rules. Coffee is wildly complex and I have no doubt that there will be times when coffee tastes its best outside of these parameters!
At CCB, we don't generally like to pour single espressos. You need to grind very fine to get a reasonable tasting shot and this can often lead to channeling and other issues. In addition, the changes between a single and double espresso are generally so large that maintaining any sort of consistency can be a bit of a nightmare. We'd recommend either pouring or drinking doubles or splitting a double shot for two singles.
So now that that is out of the way... Let’s make some coffee!
The brew guide
Step 1: choose your coffee
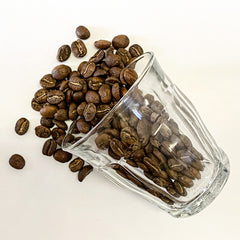
The most important factor in brewing any sort of coffee, is that you use good quality coffee. No amount of skilled brewing can make a bad coffee taste good. It is also quite important that you choose the right coffee for your espresso. This might take a little bit of time as you learn how different coffees behave in different ways when brewed as an espresso, but here are a few guidelines to help you when starting out
If you have a favourite roaster and they have an espresso blend, this is a great place to start. These are generally quite easy to work with and naturally well balanced in espresso. Playing around with these coffees before moving onto single origins would be the easiest way to find your feet.
When choosing a coffee, it is good to be aware that brewing for espresso will often highlight a lot of a coffee's acidity. If you are brewing an already acidic coffee, it can be far more challenging to get a well balanced cup, and you can find yourself fighting a losing battle against sour tasting shots. That's not to say that you can't get a delightful tasting Kenyan on espresso with vibrant fruity acidity that dances around your palate - it is just significantly more difficult to achieve. If you are just starting out, you will have an easier time working with a coffee that has medium to heavy body and a mild acidity. Often naturally processed coffee (particularly those grown at low altitudes) are a great option and if it has tasting notes of chocolates and/or nuts, this is a good sign.
These are the types of coffee that will behave quite well on espresso and most likely yield a delicious tasting shot, with little to no fuss. Once you have the basics mastered and you are ready to start experimenting, then it's a great time to start looking at the juicier and more acidic coffees.
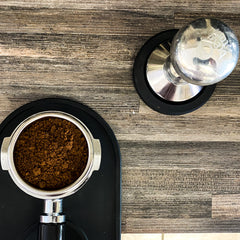
Step 2: dose & grind
I think it goes without saying that it is essential to use freshly ground coffee - this is even more important when it comes to espresso! A good quality grinder is one of the best investments you can make in your home espresso set-up. There is an argument to be made that the grinder is the most important element of any brew set up, but that is a conversation for another day!
For a double espresso, 18g of ground coffee is a good start. If you have a smaller portafilter or a smaller basket, you might need to use less, but we'll talk about how to adjust for that later in the post. We recommend weighing out your ground coffee, but if you are not weighing your coffee, we do still recommend that you take steps towards consistency. A couple of easy options include using measured scoops of coffee, or filling the espresso basket and scraping the top off, ensuring you always have the basket filled to same level. Your coffee needs to be ground into a fine powder, for a visual reference, you want it to be about the consistency of castor sugar.
Finding your grind settings is going to take time and practice, and it’s going to change more often than you would like. It’s important to remember that your grind settings will be affected by things like the density and freshness of your coffee beans as well as environmental factors such as temperature and humidity.
Step 3: tamp
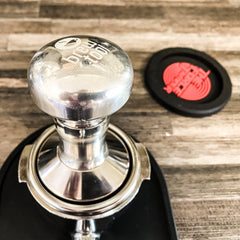
It might seem small and trivial, but making sure you tamp correctly can make the world of difference in the quality of your espresso. The goal of tamping is to compress all the grounds evenly within the portafilter. The result should be a flat and smooth bed of coffee.
Most people don’t realise this, but you begin to approach maximum density very quickly when tamping (if that sentence is a bit confusing, check out the Barista Hustle article, How hard should you tamp). Simply put, this means that you don’t need to tamp too hard and the extra effort becomes redundant very quickly.
The most important factor in tamping is maintaining a flat surface. If you tamp unevenly your entire extraction is going to be uneven, under-extracting one side and over-extracting the other, getting the worst of both worlds.
A good quality tamper and a distribution tool (such as the Motta or OCD) will make marked improvements on the quality of your extraction. If you want to go the extra mile with your espresso set up, the Puqpress will automate your tamping, ensuring it is perfect every time. Otherwise, just make sure to tamp firm and tamp flat and you’re already there.
Step 4: pull the shot
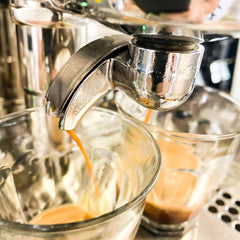
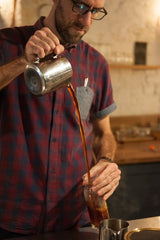
The last step is to pull the shot. Insert the portafilter, make sure it is locked in place, place your cup below the spouts, start your timer and press the button (or pull the lever) to start pouring your shot
This is where all the measurements and variables come in to play. A 2:1 ratio of ground coffee to brewed espresso is a good starting point. This means that if you are using 18g of ground coffee, you want to get 36g of black golden nectar out. We recommend using a brew scale and weighing your espresso, however, if that is a step too far, you can use a measured espresso glass to get the same amount out each time. Otherwise, try and weigh the first few shots you brew and use those to get a rough idea of how much espresso 36g is - and (provided you use the same cup) you should be able to eyeball a similar amount each time.
If you are using a smaller basket and can't use 18g of espresso, you can still use the 2:1 coffee to espresso ratio (e.g. 15g ground coffee to 30g liquid espresso or 16g ground coffee to 32g liquid espresso etc).
The second variable is time. If you are working with a medium roast coffee, you want to shoot for between 25 and 30 seconds for a well extracted espresso shot - a darker roast might taste best running a little faster and a lighter roast a little slower. If you find your shots running fast, the first thing you want to try is grinding a little finer. If that doesn't work, you can also try dosing a little more coffee.
Keep reading below for some troubleshooting tips that should help decide when to grind finer, when to dose more and how to make your shots taste better.
Step 5: enjoy
And there you have it. You should have a rich, sweet and delectable espresso. This is hands down and without a doubt the most important step in this journey. All that's left is to chill out in your favourite spot, sip it slowly (or knock it back) and enjoy the fruits of your labor.
As you progress along your journey into coffee, your ability to taste and identify more intricate and complex flavours will develop. If you want to explore taste and flavour, James Hoffman's coffee vlog is a great place to learn. Why not start off by checking out this vlog about swirling your espresso and why you shouldn't do it.
Espresso troubleshooting
Despite being a seemingly simple exercise, brewing espresso can be detailed and complex. Sometimes, things don't quite go according to plan. We've compiled a short list of common espresso problems and how to fix them.
Sour taste: one of the most common issues brewing espresso, particularly with lighter roasted coffee, is ending up with a sour tasting shot. This is caused by under extraction. In order to fix this, you want to increase the time that your shot runs for (if needs be, don't be afraid of pushing it outside of of the guidelines outlined above). In order to extend the time your shot pours for you need to grind finer.
Weak or thin espresso: this is generally due to using too little coffee or too much water in your espresso resulting in a weak cup. If you stick to the 1 part coffee (18g) to 2 part espresso (36g), you shouldn't have this problem. With that in mind, this is a great variable to play with - sometimes pulling a slightly longer shot really opens up the complexity in your espresso, a little like adding a drop of water to your whiskey.
Bitter or astringent espresso: Bitterness is usually caused by over extraction and astringency usually comes from channeling (channeling is where the water makes a pathway through the coffee puck and only pours through this pathway, causing uneven extraction). Both of these problem can be fixed by grinding a little coarser and letting your shots run a little faster.
Tried everything and coffee still runs too fast: If you've tried everything and the espresso is still running too fast, your coffee might be old and stale. Freshly roasted and freshly ground coffee is essential for good espresso.
Espresso tastes flat: Flat tasting coffee is a result of the beans being stale. To avoid this, make sure that you are grinding your coffee immediately before brewing and buying freshly roasted beans.
Barista Hustle Espresso Compass: If you want to explore this further, there are some great resources out there; a great place to start is Barista Hustle's espresso compass. It provides a great visual reference for how making various changes has an impact on the resulting cup. Check it out here.
Final thoughts
This is the beginning of an exciting journey of experimentation and flavour where you will get to explore all that espresso has to offer! You will have some delightful coffees, and you will most likely have some coffees that are as uncooperative as a 3 year old on caffeine.
Let us know about your explorations - what coffees you're loving and what coffees are a struggle; we'd love to hear about your espresso recipes. Are you pulling standard shots or are you trying something different? Do you have any questions? Leave us a comment below!
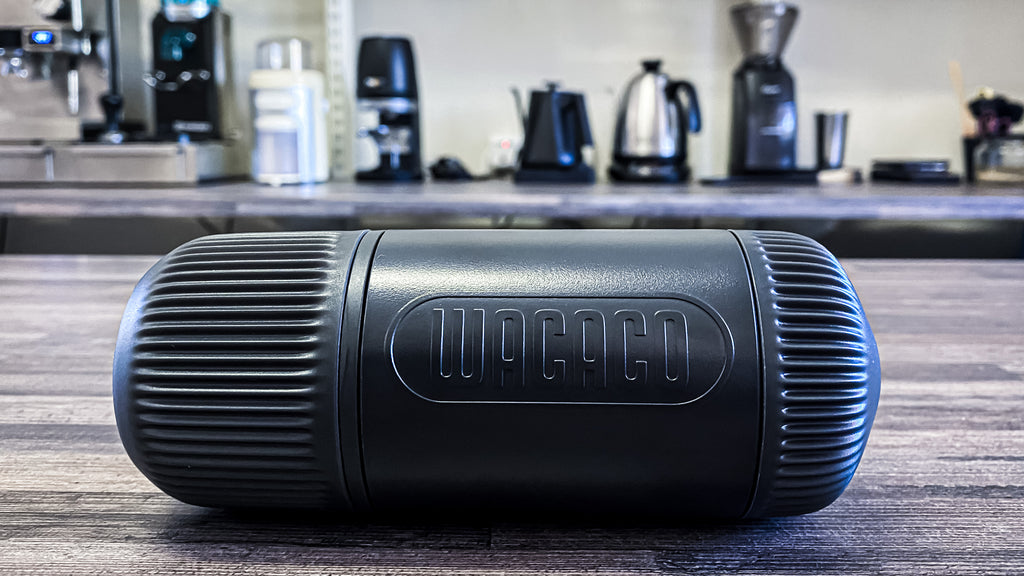
 When brewing with the Nanopresso, it is extremely important that you preheat the brewer. If you don't preheat your Nanopresso, the brewer will absorb most of the heat from the water, and by the time the water gets to the coffee, it will be too cold for a decent extraction. To preheat the Nanopresso, just fill the chamber with water, put it all together and pump it through the brewer once.
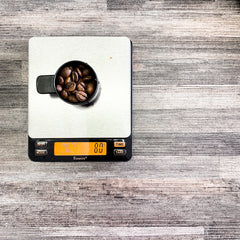 Grind 8g of fresh, good quality coffee (Grind 16g if you are using the Barista Kit). You want to grind this relatively fine, somewhere between how you would grind for Aeropress and how you would grind for espresso. If your grinder doesn't go fine enough for espresso, grinding it on the finest setting should be just about right, if it does go fine enough for espresso, you want to move it a few clicks coarser.
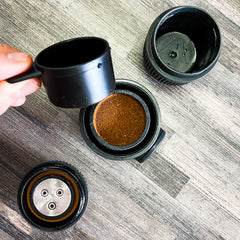 Insert your coffee into the basket and compress the ground coffee by tamping it. If you have purchased the Barista Kit, you will have a handy little tamper for this. If you just have the regular Nanopresso, the scoop is designed to fit neatly into the basket and works perfectly as a tamper.
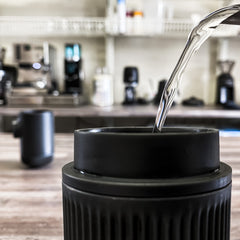 Fill the water tank with boiling water. Since heat will be lost as you pump the water through the Nanopresso, you don't want to use water off the boil. Instead, you want to use water that is at a rolling boil. By the time the water reaches the coffee, it should be at an optimum temperature for brewing espresso.
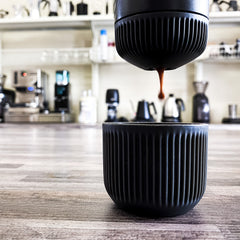 Assemble the Nanopresso and start pressing the pump slowly (about 1 pump per second) until the liquid starts to pour from the spout. When pulling your espresso shot, you don't want to pull all the water through the coffee. For the regular Nanopresso, you want to make about 15g of espresso and with the Barista Kit, about 30g of espresso.
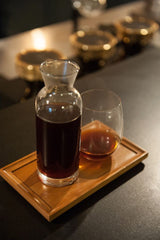
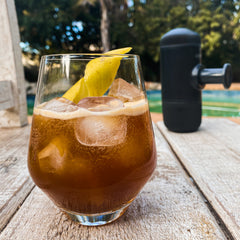 The espresso tonic truly is a drink that is greater than the sum of its parts. It's one of my all-time favourite drinks for a hot summer's day, plus, it's incredibly simple to make!
  Coffee cocktails have been real crowd pleasers for as long as coffee and cocktails have existed! This caffeinated twist on a classic cocktail is no exception!
 Coffee and ice cream - what could possibly go wrong with this grown-up twist on a childhood favourite. While we will concede that it technically isn't a drink, It truly is too delicious to ignore.


 Michaela joined the Cape Coffee Beans team as a Customerista in 2018 and has quickly become a central part of the team. When she's not busy making our customers happy, she's working closely with our suppliers to source equipment, all while making sure everything runs smoothly at CCBHQ.