An Aeropress Recipe For Two
Everyone agrees, the Aeropress Coffee Maker is a fantastic brewing device. It's portable, virtually un-breakable, easy to use and, most importantly, it makes great coffee. Even better, the internet is littered with lots of different recipes to try, from pros and amateurs alike.
As a home barista brewing for yourself, you're spoiled for choice on how to use your Aeropress, but interestingly, there are very few recipes out there that explain how to brew two cups at the same time. Recognising that many lovers of coffee come in pairs, we thought we'd try to help remedy that situation.
It is worth mentioning that this is less of a problem when you're brewing short espresso-style shots. The instructions that come with your Aeropress and the markers on the side will help you with that. One easy solution is just to brew two of those and then dilute. However, a lot of the excitement around the Aeropress is about longer filter-style brews, most often using the inverted method.
This blog post is about how to make two delicious filter-style coffees with your Aeropress at the same time. Purists will tell you that you'll get better results brewing two cups separately and there may well be a small benefit in doing that. But if you want to be able to wake up in the morning and quickly brew some coffee for yourself and a loved one, this recipe should prove a lot more convenient without much compromise on the flavour!
The Approach
If you want to get straight to the recipe, feel free to skip ahead, but for those who are interested, here's a word on this recipe's approach. The main constraint the Aeropress has is its capacity (~250ml). To make enough coffee for two cups, you need more than that.
To achieve this, while producing something very similar to "typical" Aeropress coffee, we're going to brew concentrate and then dilute it. We're going to aim for the same ratio of coffee to water in terms of yield but we're going to make the steep time a bit longer, to offset the potentially slower rate of extraction caused by the higher concentration of coffee in the water.
What You'll Need
We've divided up the list of what you'll need into two sections, the essentials and those accessories which can help you fine tune your brew. You can definitely brew delicious coffee with just the basic equipment. In fact, that initial list is ideal for travelling if you want to brew coffee for two on the road.
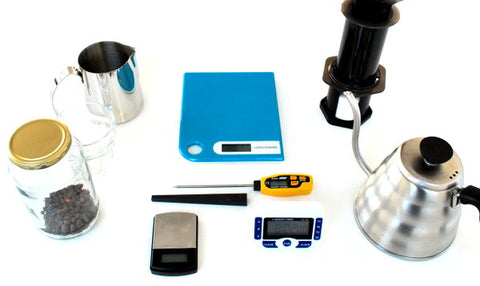
The essentials
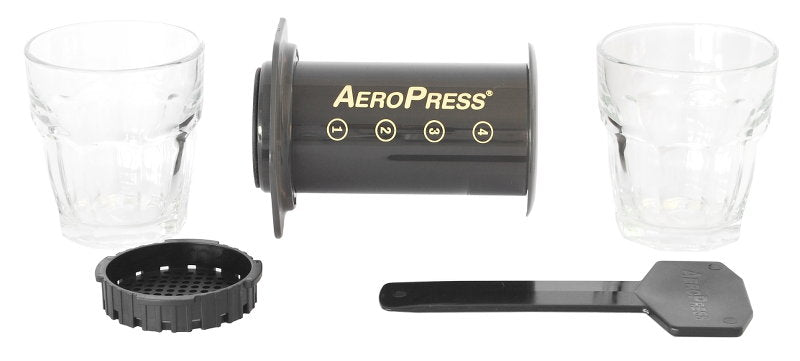
- An Aeropress (obviously)
- All your Aeropress's accessories (scoop, funnel, paddle, filter cap, filters)
- A coffee grinder
- A kettle to heat your water
- A jug to brew into that can hold ~500ml of liquid
- Some way to measure the volume of what you brew - a kitchen scale works well but you can also just brew into a measuring cup
- Something to time with - your phone will do!
Nice to haves
- A coffee scale
- A timer (alternatively the Hario Drip Scale can weigh & time for you all in one)
- A thermometer
How to Brew Two Cups of Coffee With an Aeropress
Here are the step by step instructions with photographs. You may want to read through everything once before starting so you can just skim through for reminders the first time you try the recipe. Reading the whole thing and brewing at the same time may be challenging!
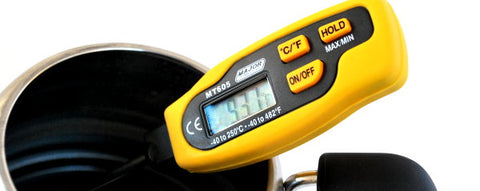
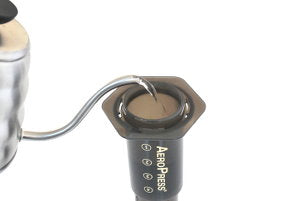
Step 1: Put your Kettle on to boil with a bit more than 500ml water (aiming for ~93C)
If you've got a digital thermometer, then you can decide to stop your kettle when it hits ~93C or you can let it boil and then wait 1-2 minutes for it to cool down to around that temperature. Our favourite trick is to pour freshly boiled water into a Hario Buono Kettle which brings it to about the right temperature instantly.
Step 2: Weigh 36g of coffee & grind to a medium setting
We're using 2x the amount of coffee you'd use for a regular inverted brew. If you don't have a scale, it should be about two heaping Aeropress scoops. Any burr grinder, manual or electric will do the trick here. We use setting 5 on the Severin Coffee Grinder.


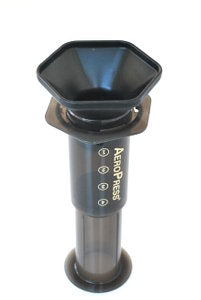
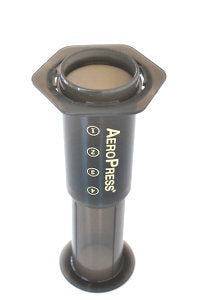
Step 3: Set up your inverted Aeropress and put the coffee into the chamber
Step 4: Set a timer for 2 minutes, press start, bloom with a small amount of water and stir
The aim here is just to saturate all the coffee grounds. You'll form what almost looks like a thick paste. This is to encourage any trapped CO2 to get out of the way and let the extraction happen properly afterwards.
Step 5: Fill the Aeropress chamber almost to the top, leaving room for more stirring
You should have ~1m30s left on the clock at this point. You want to top up the Aeropress as much you can while allowing for spill-free stirring. Stir for 10-15s, really getting the coffee and water moving for maximum extraction. This is particularly important since you're brewing concentrate.
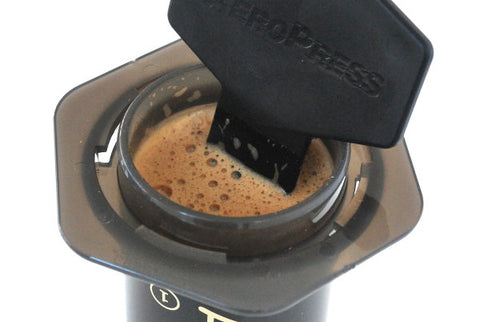
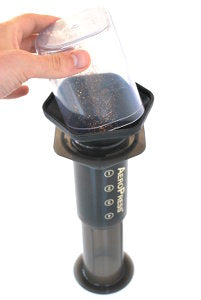
Step 6: Fill the Aeropress to the very top & leave to steep
Now you just let the extraction magic happen for the remainder of the 2 mins you started with (there should be ~1 min left). This is a bit longer than your typical Aeropress steep time because we're making sure to get a full extraction despite the higher ratio of coffee to water. This is a good time to wet your paper filter.

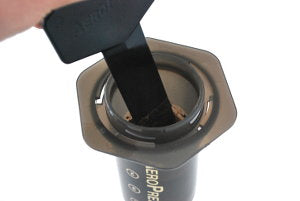
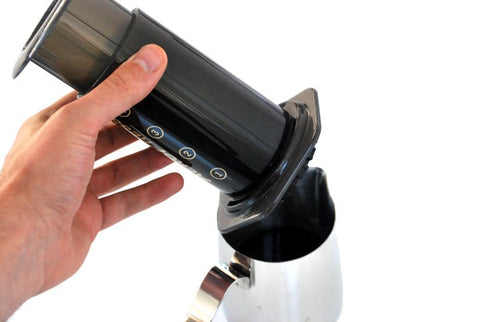
Step 7: Place the filter cap on the Aeropress, flip onto your brewing jug and plunge (should take 30-45s)
You'll need to put the filter cap on just a little before the time runs out to make sure you're ready. Don't rush the plunging process. It may be a little harder because of the amount of coffee in the chamber. Take your time and keep pushing through the hiss at the end until every drop of concentrate is out.
Step 8: Dilute to ~430ml
Why 430ml? We're aiming to get double the yield of a 250ml/18g Aeropress extraction. If you had a giant Aeropress & brewed 500ml/36g, you'd expect each gram of coffee to absorb ~2ml of water so the yield would be about ~430ml (428ml if this were exact).
A measuring cup is an easy way to go here but you can also do this using a scale. The trick is to tare the scale with the empty jug before you press into it, then put it back on the scale with the concentrate. You'll be somewhere around 200g and then you can just fill up to ~430g.
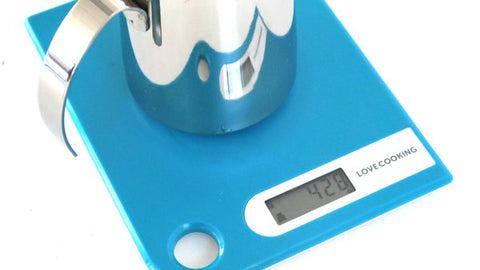
Note: Don't plunge on top of your scale - that's a surefire way to break it
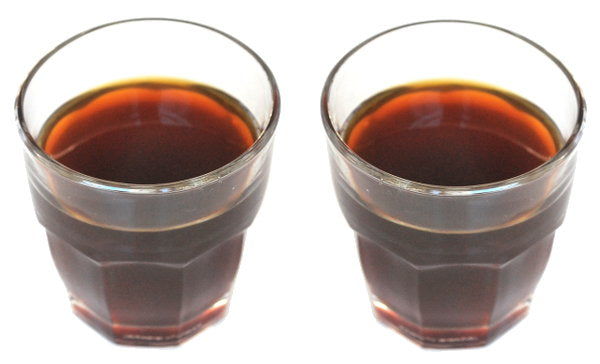
Happy Brewing!
As with all coffee recipes, you should absolutely tweak this recipe to suit your taste, but hopefully you have a good foundation here - this should help you score some points with a loved one and get your own coffee fix, quickly & easily!
Comments
Thanks guys, will definitely try it and let you know how it turned out.
Posted by Albert on March 26, 2015
This method really works, I use it every day except I use 32g of coffee.
Posted by William on March 26, 2015
This post is amazing. Can’t say anything else other than that. Oh, and I want your drip pour kettle :)
Posted by Nick Soper on March 26, 2015
i find for stronger brews like this recipe, the able metal filter works really well. More body than the paper.
Posted by David Coleman on March 28, 2015
Thanks for the comments everyone! Definitely agree with David that a metal filter would work well for this recipe. Also agree with William that you could adjust down the ratio based on your personal taste (and the coffee you’re using).
Posted by Cape Coffee Beans on March 30, 2015
I just tried this recipe and I like it! The coffee is rich, and it’s not bitter. I’ve been having trouble with my Aeropress lately. Most of the coffee I’ve made has had a stale, kind of dusty taste. But I used the same coffee beans with this recipe and it came out great! Thanks for the great recipe, and excellent detailed instructions!
Posted by Brandon on September 10, 2016
We prefer a latte. – Make 2 cups at same time.
Purchase a 500ml clear glass bottle.
Mark off 250ml – put in microwave 2m10 sec.
At same time put kettle on to boil
Grind 2 level scoops of fresh beans – get the best you can find.
Wet the filter and fit to barrel.
Using the funnel – pour grounded coffee into the barrel.
By now the Microwave has signalled finish.
Place bottlle with hot milk on a breadboard (save it from cracking).
Transfer the funnel to the Bottle top..
Set the coffee containing barrel in place onto the funnel.
Meanwhile the hot water has stopped boiling abojut 30 sec ago.
Pour hot water up to about 1/2 way.
Stir actively for 15 sec.
Fill the barrel up to the very top.
Wait 30 sec.
Stir gently – the top has become porridge – llike.
Meanwhile some of the coffee has been filtering through passively – just ignore that.
Top up again – but allow space for the plunger. (We do not invert).
Place plunger then transfer the whole unit onto a cffee cup.
Gently press directly into a coffee cup. (45 sec.)
You will now have a coffee cup with 250 coffee.
Pour 1/2 the coffee into partners cup.
Top up the cups with the hot milk giving 250ml/cup.
Stir with the stirrer.
Add a litttle hot water.
Add a pop of cream.
Voila! – 2 beautiful cups Latte.
Problem – it won’t do more than 2 cups!
Posted by Peter and Di Comfort on September 26, 2016
There’s a MUCH easier method, actually…. it’s funny no one’s ever thought of it. It allows you to make three or four cups if you want to, in a couple of minutes. I’ll have to make a video :)
Posted by Nils on August 18, 2017
@Nils, looking forward to your video!
Thanks for the recipe!
I make 1/2 liter, 476 ml, this way. I set time fir 3 mins. Bloom – 30 secs, fill half way on AP – stir, filll – stir, top off, let brew renaming time, about 1:30 – 2:00 mins. Press for 20 secs.
Posted by Morgan on September 25, 2017
Very informative. Thanks team
Posted by Tracy-Lee on June 02, 2020
Nils, what do you do? I want to be able to make 32oz of coffee, two 16oz cups. Can i just double this recipe and add more water to dilute? Sorry for the lack of metric system.
Posted by Donald Novotny on November 02, 2021
To the capecoffeebeans.co.za administrator, Your posts are always informative and up-to-date.
Posted by Edmund Rehfisch on March 09, 2023