How To Get The Best Out Of Your French Press / Coffee Plunger
Whether you call it a french press or a coffee plunger (or anything else for that matter), there's a pretty good chance you've got one in your home. These classic coffee makers are everywhere, but tragically, they're often held in poor regard. In reality, the biggest problem with the french press is that most people just don't use it correctly.

We really believe that even the most humble coffee plunger can produce a great cup of coffee with a little care and attention. This classic brew method actually produces wonderful, full-bodied cups of coffee and captures the full array of flavours and aromas that your beans have locked inside them. In this article, we'd like to give you our take on how to get the best out of your press.
The Dos & Don'ts of French Press Brewing
Later in this article, we've included a step by step guide on coffee plunger brewing, including some helpful photos, but we thought we'd start with some basics. Getting better coffee out of your french press can be as simple as following some do's & don'ts.
Do |
Don't |
|
|
|
|
|
|
|
|
|
|
What You'll Need
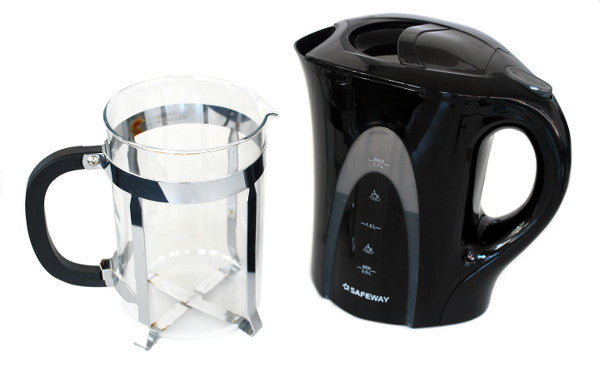
- A french press / coffee plunger (even that old one at the back of your cupboard will do)
- A coffee grinder
- A kettle to heat your water
- Something to stir with (ideally not metal if you don't want to scratch your glass)
- A Hario Drip Scale OR the following items:
- A kitchen scale to weigh your water
- A more precise coffee scale to measure your coffee (if possible)
- A timer (most phones have one if your kitchen doesn't)
- Optional: a thermometer to measure water temperature
Step 1: Decide how many you're brewing for & put the kettle on
One of the great things about french presses is that they come in all different sizes and it's one of the few brew methods that isn't much affected by the amount of coffee you're brewing. Use a ratio of 60g/L; for instance:
- 1 mug: 15g coffee & 250ml water
- 2 mugs: 30g coffee & 500ml water
- 3 mugs: 45g coffee & 750ml water
- 4 mugs 60g coffee & 1000ml water
- etc.
So pick how many you're brewing for and put the kettle on, BUT we'd recommend boiling 2x as much water as you'll need for brewing (see step 3 below).
Step 2: Weigh & grind your coffee
The kettle will take a while to boil, so this is a good time to weigh out your coffee beans using the 60g/L ratio. Set your grinder to a coarse setting. For most home grinders, the coarsest is a great place to start. On the Severin Coffee Grinder, we use setting 10. Ideally, wait till the last convenient minute to grind so your coffee is as fresh as possible!

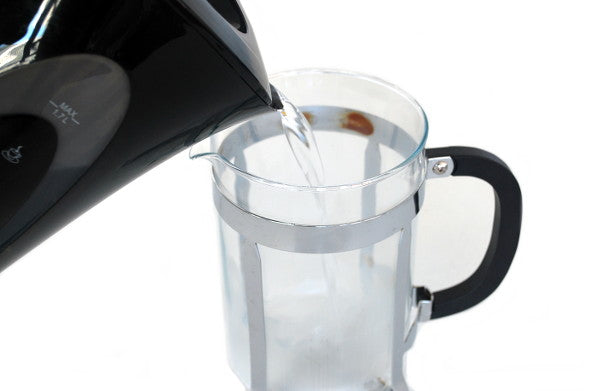
Step 3: Pre-heat your brewing vessel
When your kettle has boiled, pour some of the freshly boiled water into the brewing vessel to pre-heat it. A lot of heat will be lost as you brew, so by pre-heating, you keep the brewing temperature a bit more constant.
Step 4: Let your brewing water settle to ~93°C
During this time, you also need to let your brewing water come to ~93°C. A thermometer is handy here, but depending on your kettle, you need to wait around 1-2 mins after boiling to get in the right temperature range. Erring towards slightly cooler rather than hotter is probably a good idea if you don't have a thermometer. Water that is too hot will scald your coffee and make it bitter!

Tip: If you have a Hario Drip Kettle, pouring freshly boiled water into it will bring the water to the right temperature more quickly!
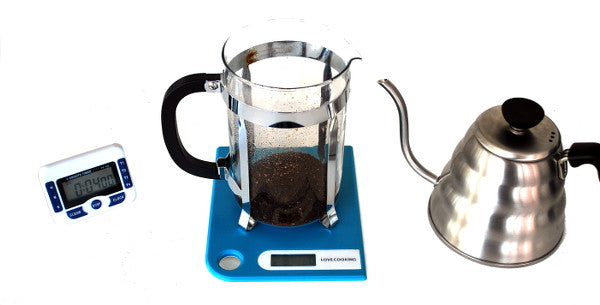
Step 5: Discard your vessel-heating water and add the coffee grounds to the bottom of the plunger

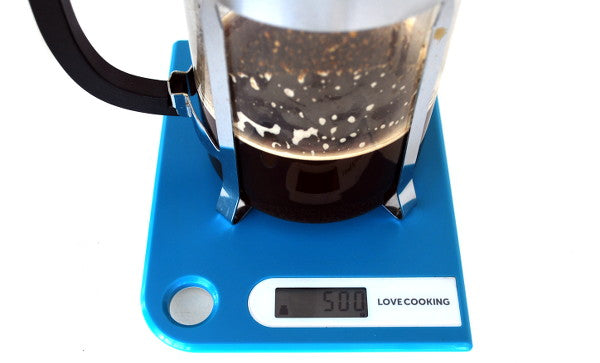
Step 6: Set a timer for 4 mins and put your plunger on top of a 'zero-ed' scale
Timing your extraction is very important. Too short and your coffee will be sour and acidic. Too long and your coffee will be bitter. Don't leave it to chance - use a timer!
In a similar vein, you need to make sure you're using the right amount of water, and the easiest way to do that is to use a kitchen or Hario Scale. 1ml of water weighs 1g.
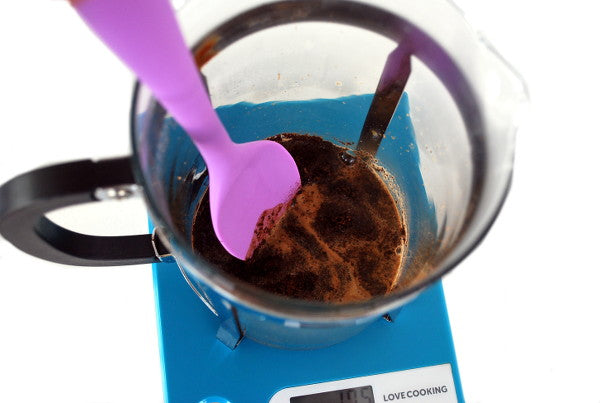
Step 7: Bloom your coffee with a bit of water (2-3x coffee weight)
It's good practice to start by encouraging the gases to escape from your coffee (called blooming) before adding the rest of the water. Try to start your 4 minute timer just as you pour the first bit of water onto the coffee. Aim for 2-3x the mass of the coffee you're brewing (you don't need to be super precise here) and give it a good stir. You should see the gases escaping and creating foam.
Step 8: Add the rest of the water to your desired weight/volume
Do this slowly & methodically, trying to get even contact with all of the coffee. Give it a stir once the water is all in.
Step 9: Stir again every minute or so
To encourage a full extraction, give the coffee a gentle stir every minute or so. Don't do it too vigorously to avoid over-extraction but just a little movement to avoid the grounds settling. We don't find that you need to put the lid on while the coffee is extracting, but opinions differ on this topic!
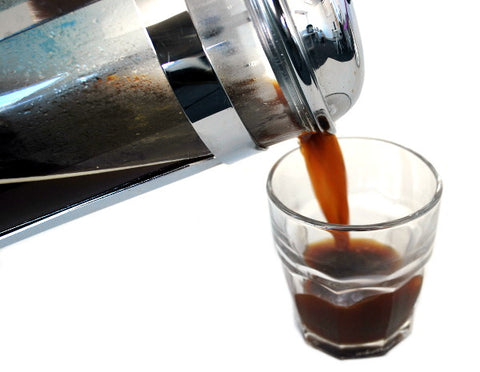
Step 10: Plunge at 4 minutes & serve or decant immediately
Once your timer sounds, plunge the coffee all the way to the bottom (don't be shy) and quickly serve or decant. The wire mesh in your french press does not completely separate the coffee from the water so if you leave it in there, it will become over-extracted & bitter.
Note: Plungers leave a bit of sediment at the bottom of the cup, but as long as you don't try to drink it, it shouldn't bother you at all and should just settle to the bottom!
Happy Brewing!
Comments
Nicely written :) I like French press. Gonna try do it this much more better way. As a side note though. Woolies Pre-Ground Flavour coffee is nice though.
Posted by Rita on July 02, 2015
What Capetonians don’t realise, and I suspect many Jozizens don’t either, is that water BOILS at 94 degrees on the highveld – one degree less for every one thousand feet. So in Jozi we can pour almost immediately after boiling the kettle!
Posted by Peter on July 03, 2015
I make our coffee with a plunger every morning. Many thanks I have learnt a few more tips for a better coffee.
Posted by Aubrey Christie on July 04, 2015
Also from the Free State ‘highveld’, thus no need to pay much attention to the temperature… However, hopefully, the kettle (plastic, probably ABS) is just for demo purpose. The ‘plastic’ substances released during boiling still gives off a slight aroma for many years. Thus, useless drinking from beautiful glassware and not boiling the water in a proper stainless steel or glass kettle, nowadays they are not that expensive ;-) Don’t spoil your freshly ground by using a ‘plastic’ kettle!
Posted by Pieter on July 05, 2015
Thank you all for your comments and for the valuable contributions! Some great points there on boiling temperatures and equipment!
Posted by Cape Coffee Beans on July 06, 2015
Hi, thank you for this informative article. Learnt a few things.
Posted by Devan Padayachee on February 11, 2019
Hey,
Good points. But i have a issue last few days my coffee doesn’t taste right. So, what is the reason for this? Please gave me suggestion on it.
Posted by Paul Miller on March 04, 2020