This product typically takes 1-2 working days to dispatch
Since it initially hit the coffee scene back in 2005, the original AeroPress™ has relatively rapidly become totally iconic. The sturdy but attractive and portable design, no-fuss cleanup and ease with which the AeroPress can make a good cup of coffee launched it into early stardom, and the brewer’s popularity has only grown in the years since it landed on store shelves. The AeroPress is so popular and successful that it has spawned numerous national and international brewing competitions, like the World AeroPress Championship, and has effectively pioneered an entirely new manual brewing category.
One of the few consistent complaints (which is perhaps too strong a word all things considered) levelled at the AeroPress has been about its capacity. While there are ways to brew more than one cup, it’s never exactly been the brewer’s forté. Until now, that is: meet the AeroPress XL.
About the AeroPress XL
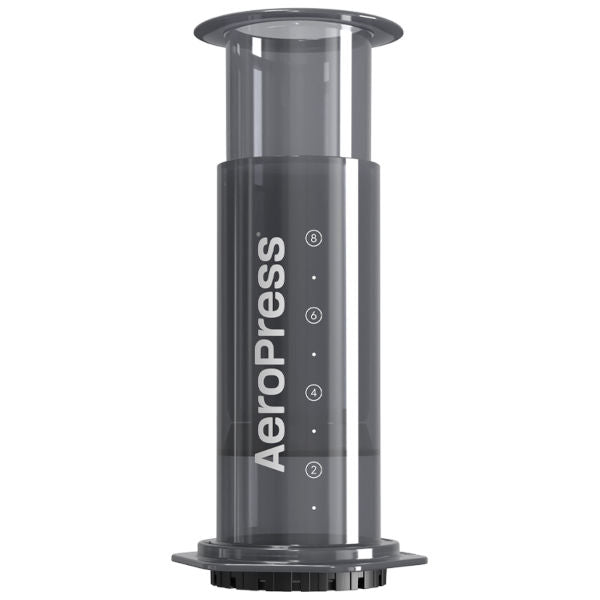
The AeroPress XL is the same AeroPress you already know, but thanks to a 600ml brewing capacity (you could stretch it a little further if you’re brave and/or adventurous enough to opt for the inverted brewing method) there’s just twice as much of it to love. It’s made of the same durable polypropylene as the standard AeroPress (though in a darker shade of grey), and comes with the same gadgets in the box: a stirrer and scoop.
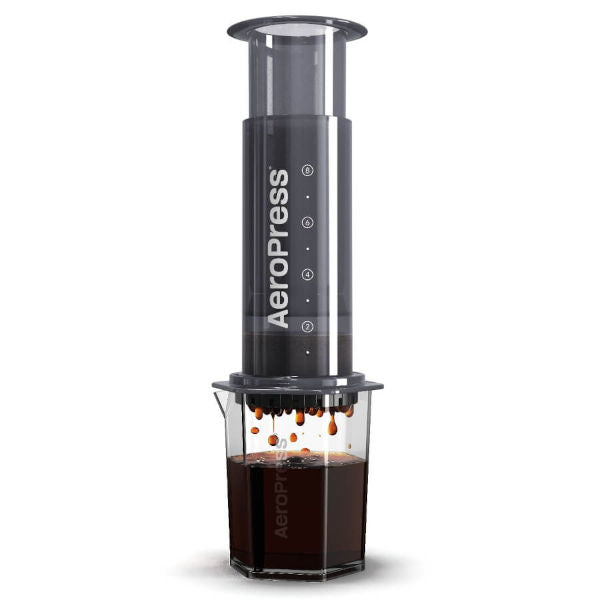
The increased size means that brewing straight into a cup or standard server is less of an option than before (you’ll need something with a suitably wide rim), but that’s not much of a problem given that, like the AeroPress Go, the XL comes with its own server. In the box you’ll find a hexagonal 600ml carafe, made of the same clear, shatterproof Tritan as the AeroPress Clear. This server also fits any other AeroPress model you may already have.
It’s worth noting that other than in the carafe’s case, the XL doesn’t share much more cross compatibility with its smaller siblings. It requires bigger micro-filters (of which 100 come in the box), which also means it needs XL-ified accessories like metal filters and alternative filter caps. No doubt suitable accessories will become more prevalent on store shelves a little further down the line, so keep an eye out for those if you’re interested. With that said, the AeroPress XL still comes with everything you need to start making great coffee at home, in the office, or on the road, now in greater quantities.
AeroPress XL Coffee Maker features and specifications
- Incredibly easy to use
- Highly versatile - can make short, intense shots and long filter-style brews
- Produces a clean cup of coffee with minimal sediment thanks to a small paper filter
- The ideal AeroPress for brewing multiple cups at once
- Still portable despite the increased size
- Entirely manually operated - ideal for camping or travelling as no power is required
- Carafe’s Tritan™ plastic is BPA free, durable and very easy to clean
- Made from Polypropylene and medical grade thermoplastic elastomer
- BPA, BPS and Phthalate Free
- Capacity: 600ml (AeroPress XL); 600ml (included carafe)
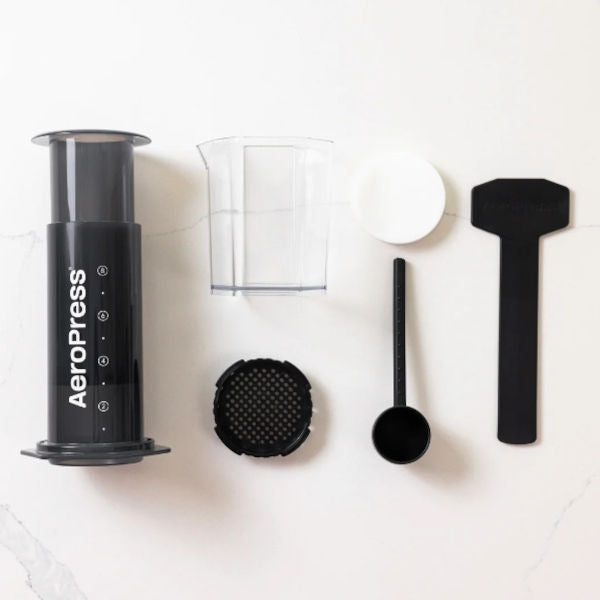
Included in the AeroPress XL box
- An AeroPress XL coffee maker (plunger with seal, chamber and filter cap)
- An AeroPress carafe made of clear Tritan™
- A scoop that can be used to measure out the coffee if you don't have a scale (though we have a wide range of scales we'd recommend)
- 100 microfilters (which can be reused up to 20 times each)
- A perfectly sized stirrer
How to use the AeroPress XL
There is no limit to the number of different ways you can use the AeroPress. The internet and Youtube are littered with examples of how you can use it to make any kind of coffee you want.
What follows is the "traditional” two-cup brewing recipe:
- Put some water on to boil
- Put a paper filter in the filter cap and attach it to the coffee chamber
- Run some of the freshly boiled water through to rinse the filter
- Grind your coffee to a medium-fine (slightly coarser than espresso) - if in doubt, lean to coarser rather than finer
- Put the chamber on top of the included AeroPress™ carafe, a cup, or whatever you want to make your coffee in – just make sure it’s big enough for the amount of coffee you plan to brew
- Put ~30g of (preferably freshly ground) coffee in the chamber – this is about one scoop using the AeroPress™’s included scoop, but a scale is more exact and consistent here
- Fill the inner tube (the plunger) with just-off-the-boil water to around the “8” marker on the chamber – ideally, you want to weigh out around 500ml of water for this dose of coffee, but if you don’t have a scale then filling the chamber to this mark is a decent alternative
- Stir for around 10 seconds using the included stirrer to make sure all the coffee and water has had contact
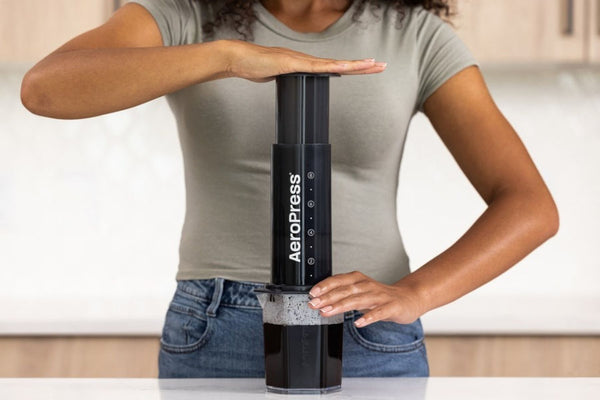
- Insert the plunger into the top of the chamber - this will create vacuum, limiting the amount of water that passes through the filter while your coffee brews
- Wait for your coffee to brew – typically between 1 and 2 minutes depending on the level of extraction you want
- Gently push the plunger down - you don’t want to rush or force this step; administering an appropriate amount of pressure, it should take you about 30-45s to completely push the water through
Then sit back and enjoy your freshly brewed, smooth, clear cup (or rather cups) of coffee!
AeroPress is a registered trademark of AeroPress, Inc.